Seawall Repair
Restore Strength and Stability Without Tearing Out Your Seawall
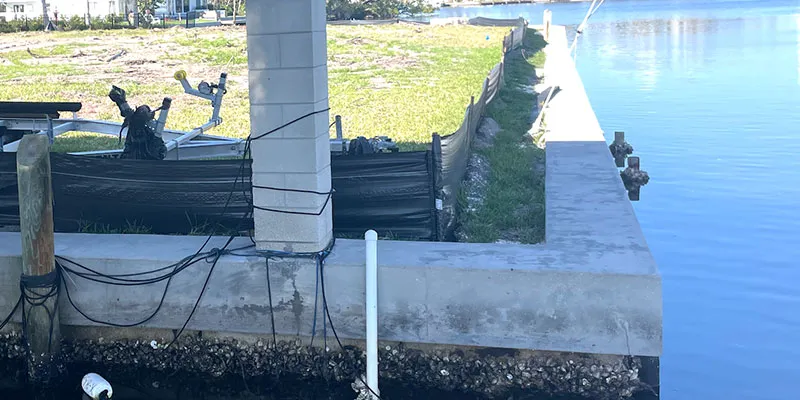
A failing seawall puts more than just your shoreline at risk. When erosion, voids, or weak soil develop behind or beneath a seawall, the structure can begin to lean, crack, separate, or lose its ability to hold back soil and water. Left unaddressed, these issues can lead to property damage, unsafe conditions, and costly replacement.
Poly Lift USA offers a fast, affordable way to repair and stabilize seawalls without full replacement. Using expanding polyurethane foam, we fill voids, stabilize eroded soil, and restore structural support—without excavation, heavy equipment, or tearing out the existing seawall. Most projects are completed in hours instead of weeks with minimal disruption, helping homeowners save 50–75% compared to full seawall replacement.
In many cases, seawall repair with poly foam is the missing step that stops ongoing erosion and extends the life of the structure.
What Is Seawall Repair with Poly Foam?
Seawall repair focuses on stabilizing the soil and filling voids behind or beneath the seawall—the areas most commonly affected by erosion and washout.
Instead of removing the seawall or excavating large sections of shoreline, we inject high-density polyurethane foam into voids and weak soil zones. As the foam expands, it fills empty spaces, compresses loose soil, and restores support to the seawall and surrounding ground. This approach addresses the real cause of seawall failure: loss of soil support.
Seawall repair often involves void filling and soil stabilization to restore lost support and prevent further erosion behind the wall.
Common Signs You Need Seawall Repair
You may need seawall repair if you notice:
- Soil washing out behind the seawall
- Voids or sinkholes forming near the wall
- Leaning, tilting, or separating wall sections
- Cracks forming in the seawall structure
- Water flowing through or under the wall
- Sudden loss of shoreline soil
- Decks, patios, or walkways settling near the seawall
These signs indicate erosion or voids that should be addressed before failure occurs.
Schedule a Free Estimate
Why Seawalls Fail Over Time
Seawalls are constantly exposed to harsh conditions. Common causes of failure include:
- Water and wave action eroding soil behind the wall
- Tidal movement and pressure changes pulling soil out
- Poor drainage behind the seawall allowing washout
- Aging construction materials losing strength
- Voids forming beneath the wall footing
- Soil shrinkage and settlement over time
When the soil behind a seawall disappears, the wall loses the support it needs to remain stable.
Problems Seawall Repair Helps Prevent
Repairing and stabilizing a seawall helps prevent:
- Continued soil loss and erosion
- Structural movement or wall failure
- Damage to nearby patios, decks, and walkways
- Costly emergency repairs
- Full seawall replacement
- Property value loss
- Unsafe shoreline conditions
Addressing voids and weak soil early can significantly extend the life of your seawall.
Why Homeowners and Property Managers Choose Seawall Repair
Seawall repair with poly foam is a smart solution because it:
- Stops erosion and soil loss at the source
- Stabilizes the seawall without replacement
- Requires no excavation or heavy equipment
- Is fast and minimally disruptive
- Helps protect nearby structures and surfaces
- Costs significantly less than full seawall replacement
It’s a proactive fix designed to preserve your shoreline—not rebuild it from scratch.
Where Seawall Repair Is Commonly Needed
Seawall repair is commonly used for:
- Residential waterfront properties
- Lakefront and coastal homes
- Retaining-style seawalls
- Bulkheads and shoreline barriers
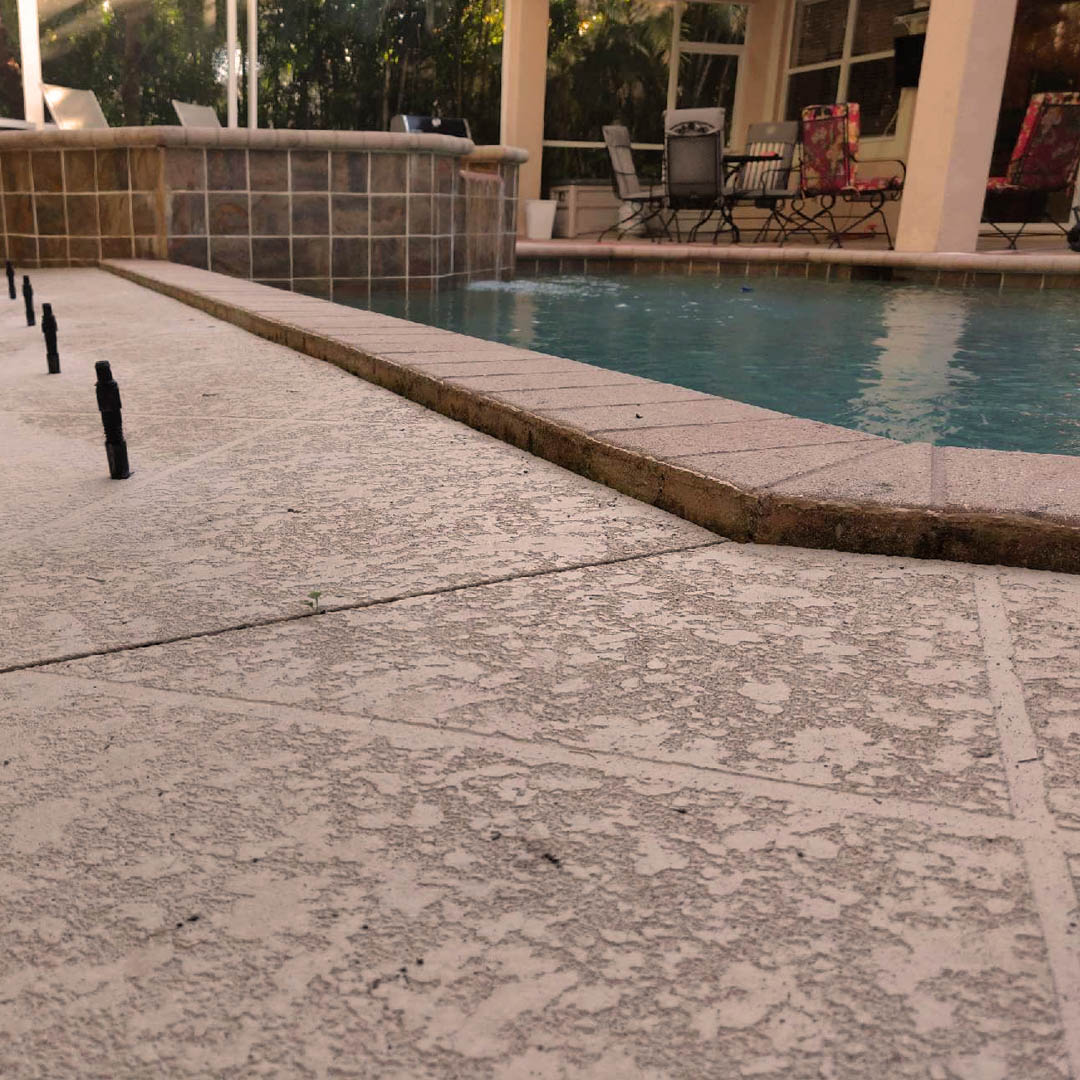
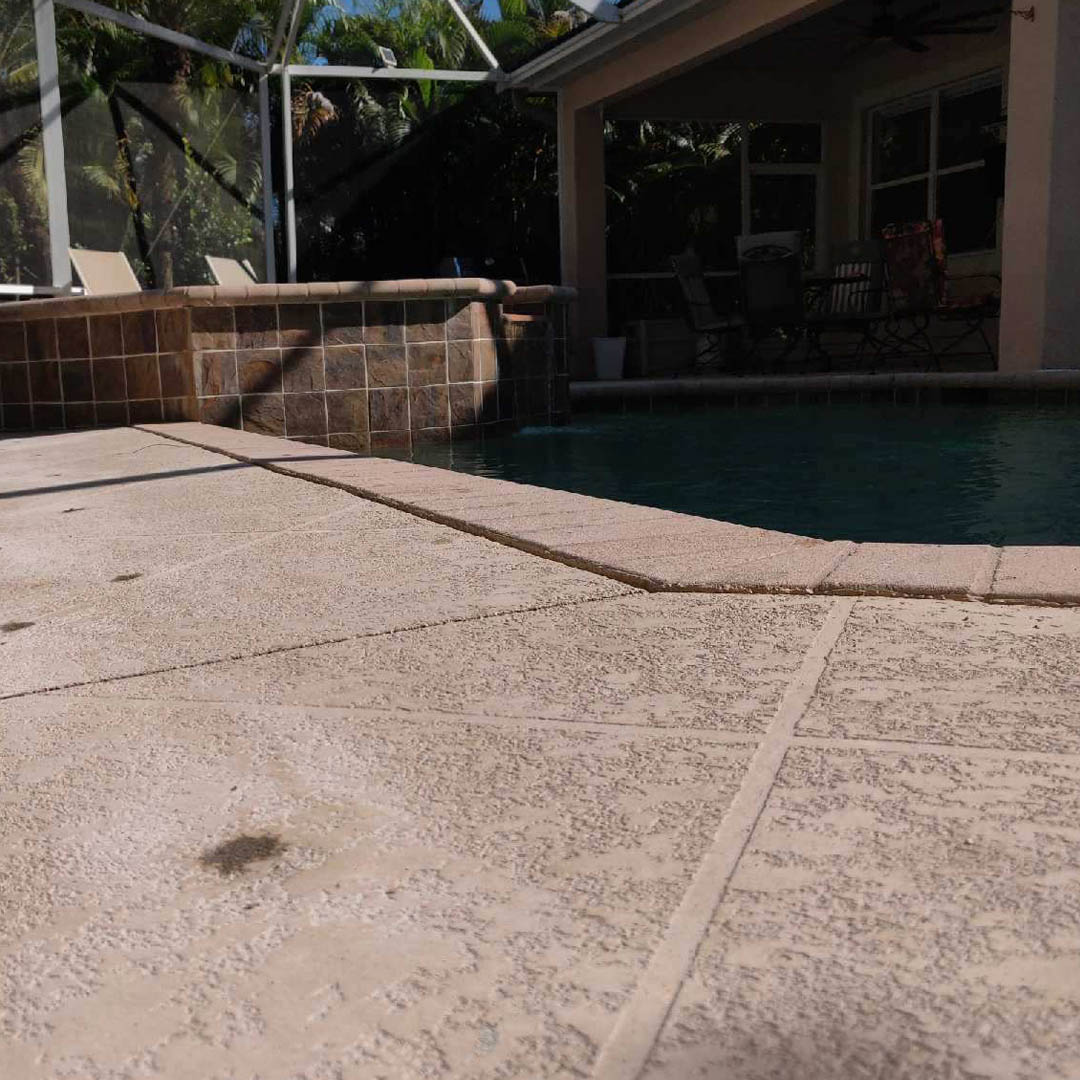
- Seawalls near patios, decks, or pools
- Areas with visible erosion or voids
It’s especially effective where water movement and soil washout are ongoing concerns.
Our Fix: Fast, Clean Seawall Repair with Poly Foam
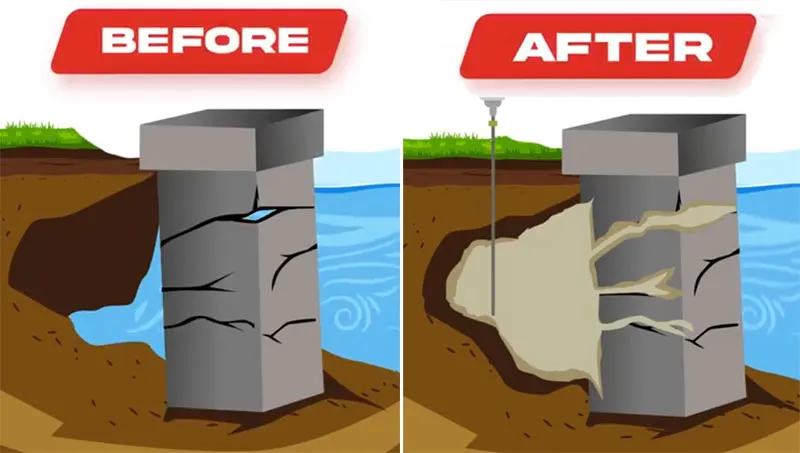
Poly Lift USA repairs seawalls using expanding polyurethane foam, a clean and effective alternative to traditional seawall replacement. This approach fills voids, stabilizes eroded soil, and restores support behind and beneath the wall—addressing the real cause of failure.
Homeowners and property managers can stabilize seawalls without tearing them out, dredging soil, or disrupting shoreline access.
Poly Lift USA is recognized across Florida, Georgia, Texas, Tennessee, and Alabama for dependable concrete leveling, void filling, soil stabilization, and seawall repair solutions. Our experience with erosion, washout, and unstable subgrade conditions allows a wide range of seawall issues to be addressed efficiently and effectively.
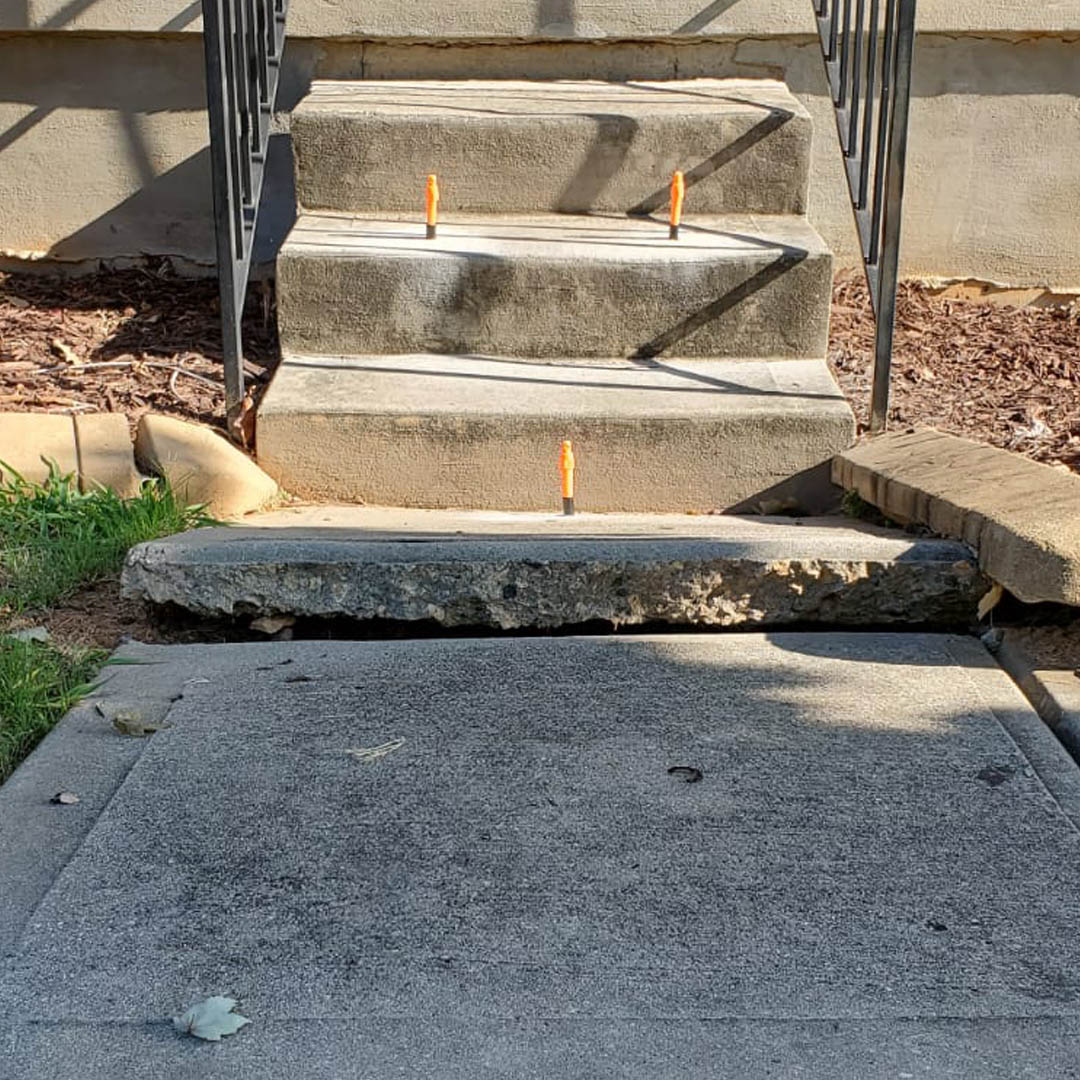
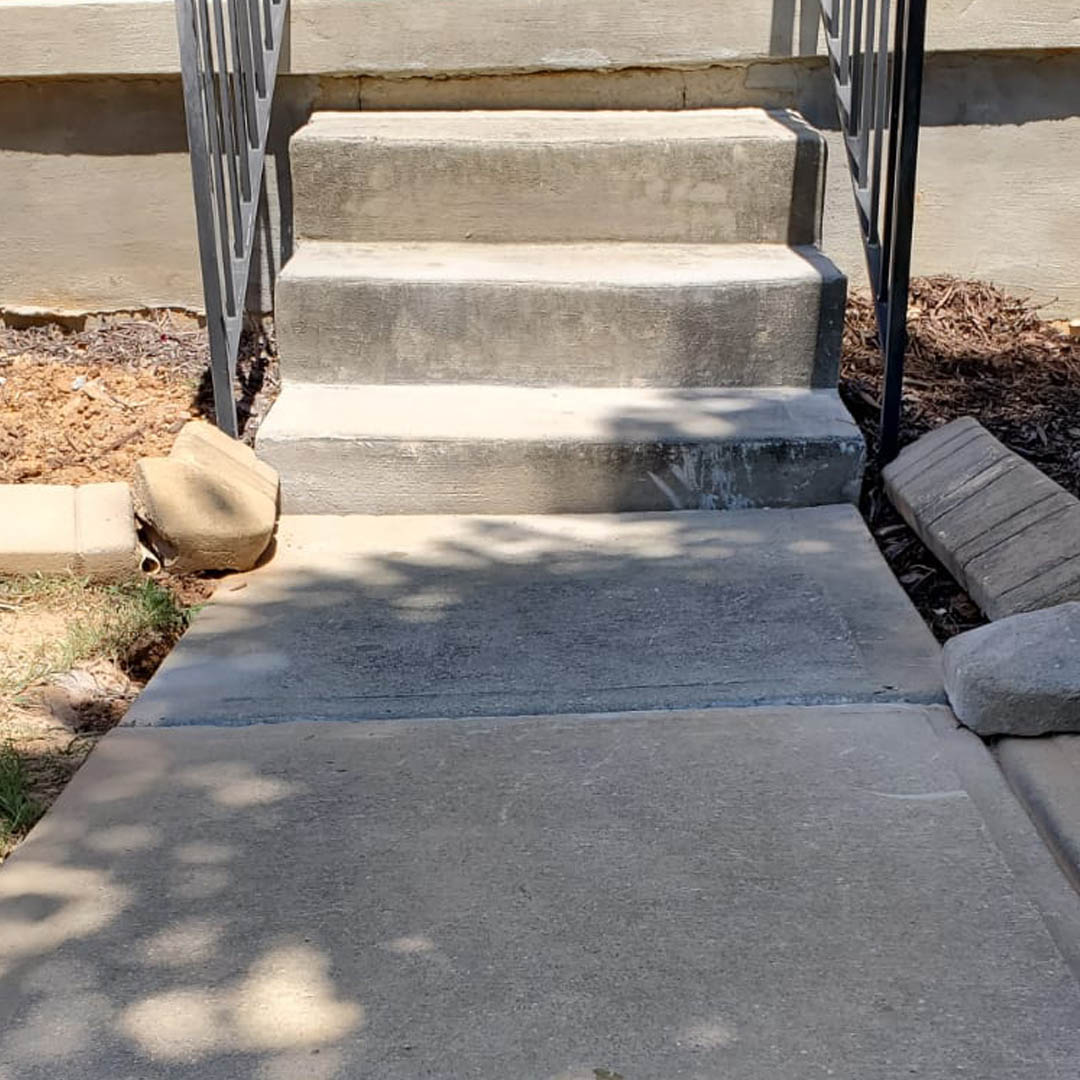
How Seawall Repair Works
The process is straightforward and efficient:
- Small access holes are drilled behind or near the seawall
- Injection ports are placed into each opening
- High-density polyurethane foam is injected, where it expands to fill voids and stabilize weak soil
- The foam hardens quickly, restoring support behind and beneath the seawall
- The ports are removed and the openings are cleaned and patched
In most cases, the area is ready for normal use the same day, with no excavation, no mess, and minimal disruption.
Why Poly Lift USA & The Benefits of FoamJection


Seawall Repair FAQs
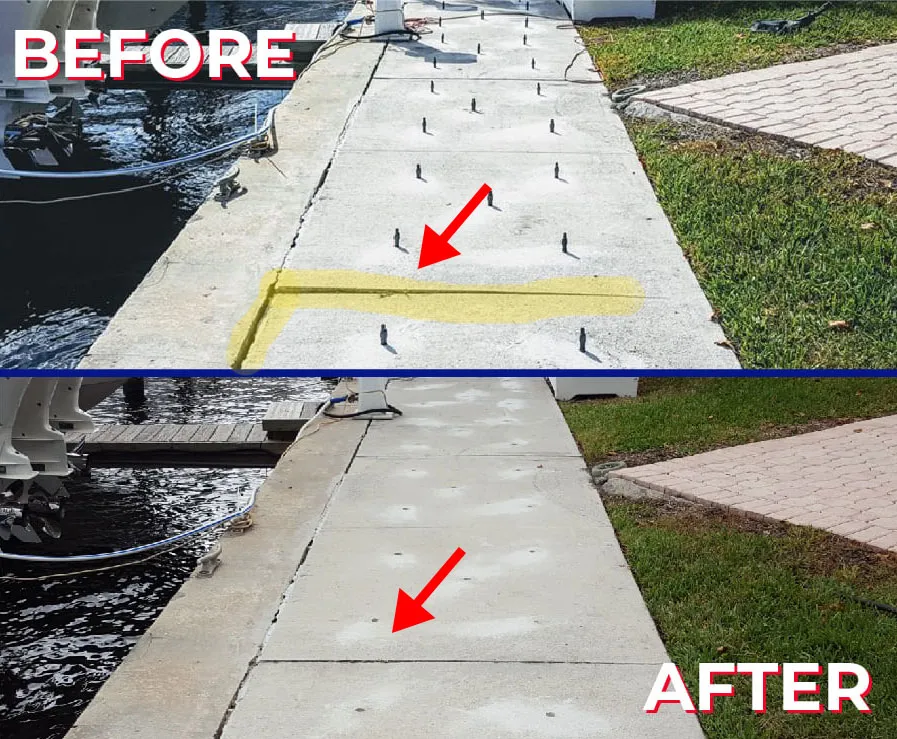
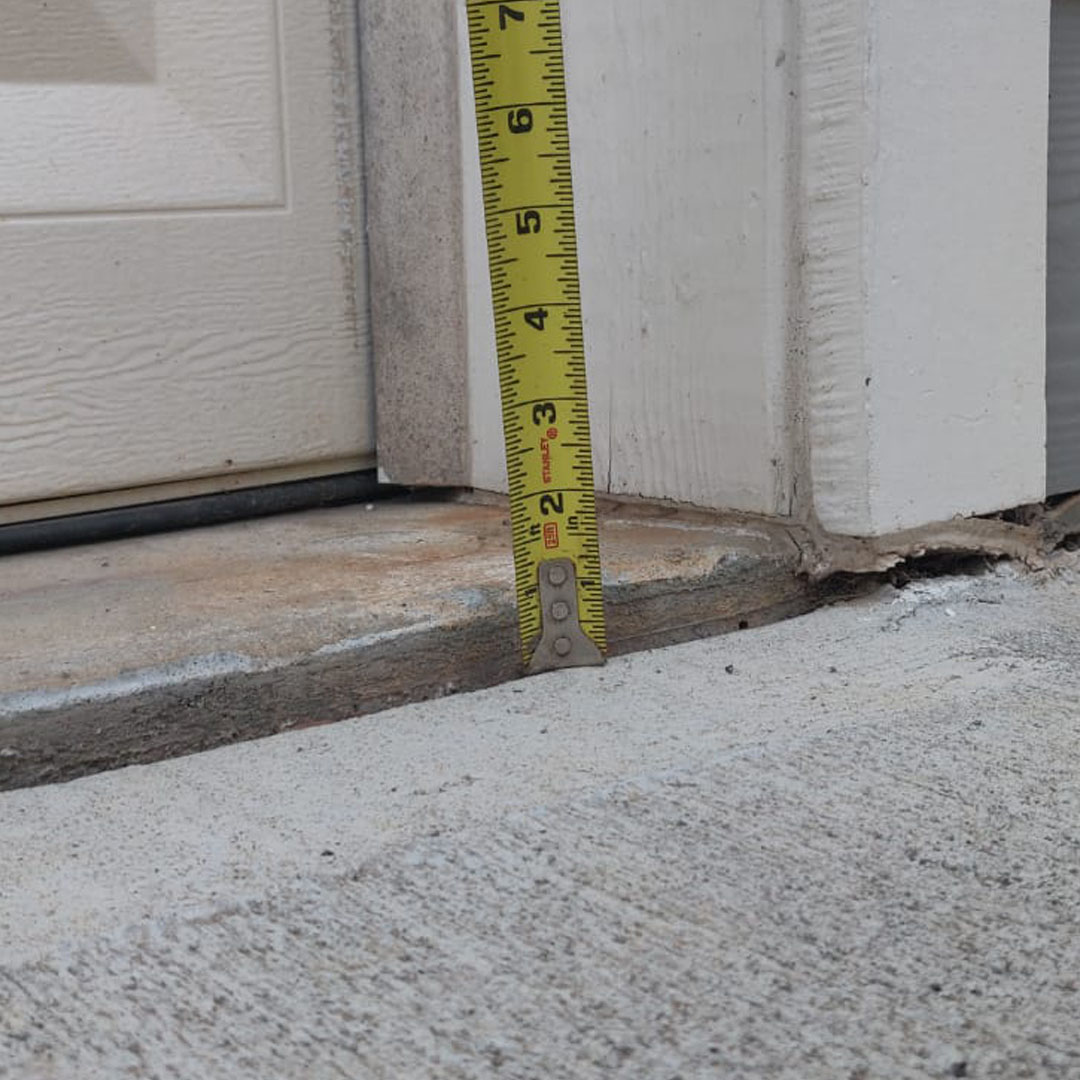
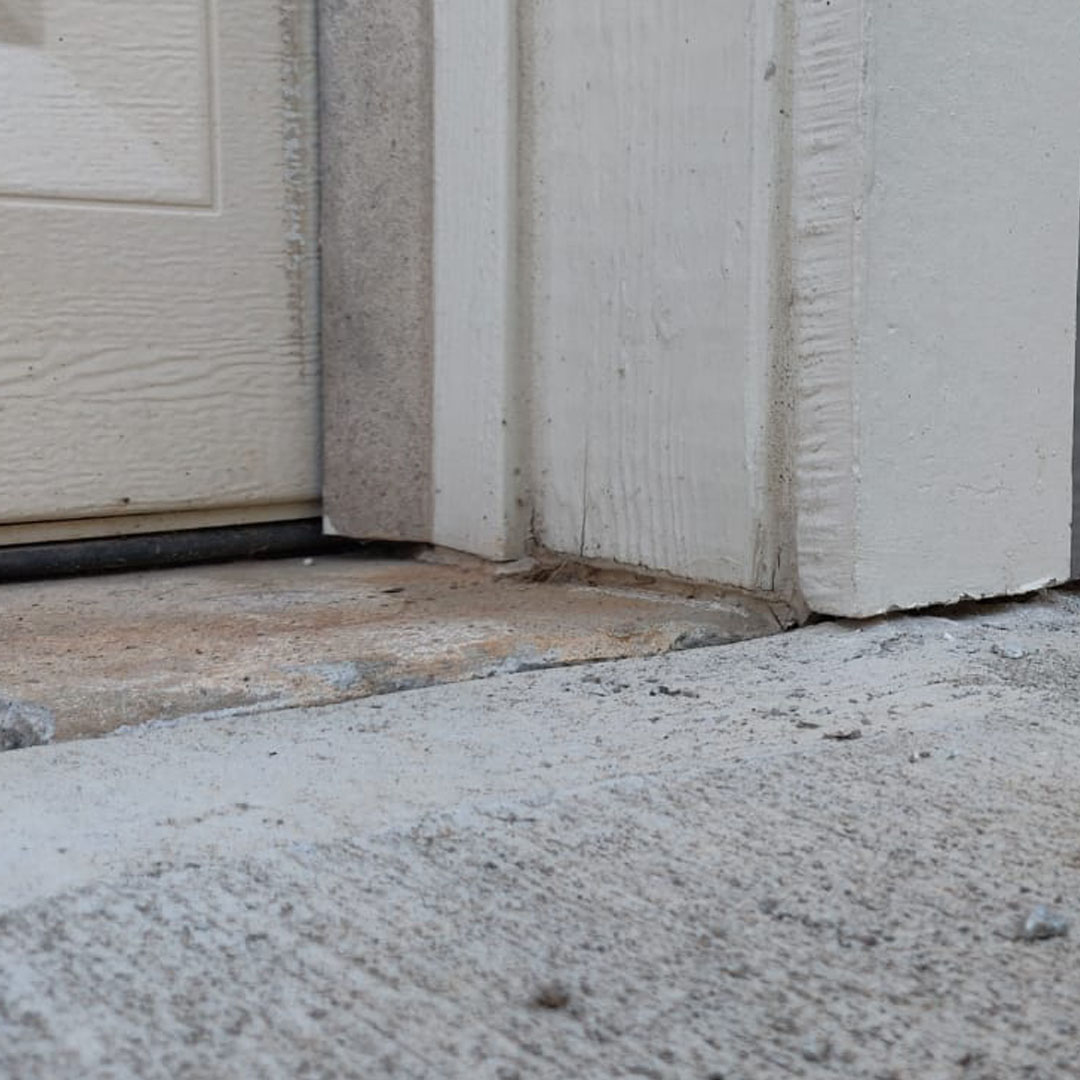
Concrete driveways rest on subgrade, which is a fancy term for the earth below. When the subgrade begins to weaken and settle, the driveway loses its support. This can be caused by a variety of factors…weather, rain, leaks, excess weight to name a few. While the root causes may vary, the end result is always the same. Structural damage.
Over time, often in months, driveway slabs begin to stress, then crack and, eventually, break apart and sink. This leads to trip hazards, unsightly appearance and a reduction in property values. This damage is structural – not cosmetic. Neither patching nor a new surface will solve the problem.
At Poly Lift USA we offer customers an environmentally safe, affordable, long-term resolution.
Our Foamjection technology has enabled thousands of property owners in Florida, Georgia, Texas and Alabama to repair their damaged driveway and save thousands in replacement costs. Our typical repair is well under 50% less than cost of replacement.
Here’s how Foamjection technology works:
- Penny size holes are drilled through the damaged slab at 5-foot intervals.
- Specially formulated polyurethane foam is pumped through the slab reaching the subgrade underneath.
- The liquid foam fills voids and expands rapidly to compact the earth beneath the slab.
- As the foam hardens it locks the slab in place. We call this stabilization.
- When lift is required, additional foam is pumped using carefully calibrated pressure gauges until the slab is raised to the desired height.
- Drill holes are filled with sanded concrete.
All Poly Lift USA repairs come with a 10-year, transferable warranty.
If you live in Florida, Georgia or Texas and your driveway or parking area is starting to crack, settle or sink, please call Poly Lift today! (844-765-9872). See why 10,000 clients have repaired, instead of replaced their damaged driveway with Poly Lift USA.
We understand how important it is to secure your property investment and protect your family.
Please don’t wait for your driveway to become so damaged that repair is not possible. If cracked pieces become too fragmented (less than 3 feet square) repair will no longer be an option. (844-765-9872)

How It Works
Before & Afters


Schedule a Free Estimate
WHERE WE SERVE Providing Expert Concrete Leveling Services Across Florida and Beyond
Expert Concrete Lifting in Florida
We proudly provide professional concrete leveling & repair services throughout Florida. Whether you’ve got a sinking driveway or void under your concrete, our team is here to help with all your concrete needs.

Concrete Raising in Georgia
From residential to commercial concrete lifting, our expert services are available across Georgia. We’re dedicated to restoring and leveling your concrete surfaces with precision and care.

Trusted Concrete Leveling in Texas
We bring top-notch concrete leveling services to communities all over Texas. Our experienced team is ready to tackle projects of any size to keep your concrete safe and stable.

Trusted Concrete Leveling in Tennessee
We now serve Tennessee with fast, reliable concrete leveling. Whether it’s a sunken driveway, uneven sidewalk, or settling patio, our team lifts it right the first time.

Trusted Concrete Leveling in Alabama
We now serve Alabama with fast, reliable concrete leveling. From driveways and sidewalks to patios and pool decks, our team lifts it right the first time.